MF-Measure TG
Attribute:
High-Magnification Zoom Model Dimension Inspection Machine
Share
Categories : Product Trial , Products , Measurement Microscope ,
Share
Make measurement and inspection more accessible!
●Ideal for increasing the efficiency of length measurement inspection!
●Uses a high-magnification zoom lens, allowing the magnification to be adjusted to suit the subject!
●Manually click on the area you want to measure!
●One-button Excel output!
●Uses a monochrome camera to improve accuracy!
*PC not included.
|Advantages of manual measurement
1.Ideal for small-lot production
When measuring small quantities of products or prototypes, manual measurement is efficient because it allows for flexible and rapid response and does not require setup time or programming.
It also allows for flexible response to special situations and measurement targets.
2.Customization
Measurement methods can be customized for objects with unique shapes or materials.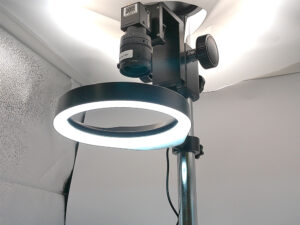
As an example of customization, reflected illumination works very well with manual measurement.
This greatly expands the range of objects that can be measured.
3.Simple operation
Manual measurement is generally simple to operate and can be used without special training. This makes it easy to use even if the person doing the measurement changes.
4.Cost reduction
Automatic measurement systems often require expensive equipment and software, but manual measurement can be performed with basic equipment, reducing initial and maintenance costs.
|Field of view range
*In reality, it is transmitted light, so it does not look like this.
Maximum viewing range: 16.0mm x 12.0mm
Minimum field of view: 2.7mm x 2.0mm
|Comparison of field of view range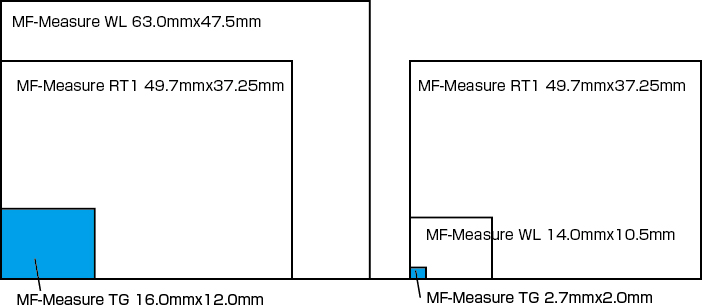
High-magnification zoom here
|Zoom lens adopted
Variable magnification possible
|Adopts parallel light transmission lighting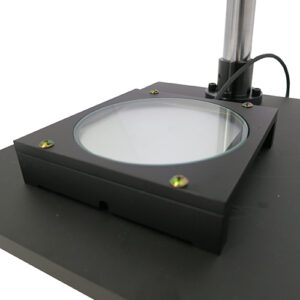
Adopts parallel light transmission lighting to reduce light leakage to
the target,clear contours, emphasize edges,
and achieve high-precision dimension measurement
Abundant dimension measurement tools and measurement assistance functions
|Abundant measurement items
●Distance between two points
●Distance between parallel lines
●Distance between horizontal parallel lines
●Distance between vertical parallel lines
●Vertical distance
●Distance between circle centers
●Point coordinates
●3-point specified angle
●4-point specified angle
●3-point specified circle
●Approximate circle
●Rectangle
●Ellipse
●Approximate straight line
●3-point specified arc
etc.
|Auto-fit edge function
When the mouse cursor is brought close to the line to be measured, it automatically fits to the edge.
This reduces human error by the person measuring and enables accurate measurements.
|Pinpoint digital zoom function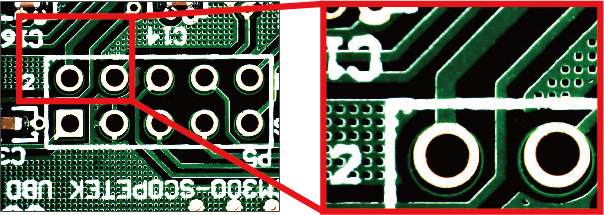
When clicking a measurement point by turning the mouse wheel, it is possible to enlarge the image with digital zoom, centered on the point indicated by the mouse cursor.
This further reduces human error by the person measuring.
|Scale display
You can display the scale in any size you want.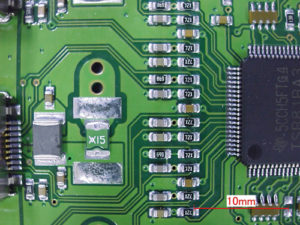
Other functions
|Krutto Focus Stacking
The "Turn Around and Combine" function is included as standard, allowing you to combine focus by rotating the focus adjustment handle (coarse adjustment angle) of the microscope or microscope.
When the object is too tall and taking a single image would result in a blurred focus, you can easily create a combined focus image.
The "Automatic Position Correction" function allows you to combine focus on images taken with a stereo microscope, which is normally difficult.
|Brightness Synthesis
Depending on the subject, dark and bright areas may be captured at the same time, and adjusting the brightness of one of them may result in the other being too dark or too bright.
If this occurs, you can use brightness compositing to solve the problem in one go!
Simply adjust the brightness so that the dark areas are bright enough, then press the compositing button to change the brightness of the areas that are too bright so that they appear normal, and you can easily create a composite image.
|One-click report creation
Transfer measurement data to Excel with one click of the Excel output button.
Data can be easily processed and graphed in Excel.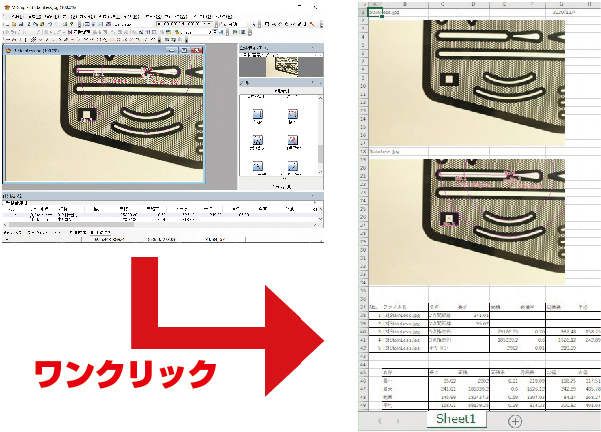
|Image Stiching Function (Tiling Function)
For objects that cannot be observed in one field of view of a digital microscope,
the image linking function (tiling function) is included, which splits the screen, captures them, and pastes them together to generate a wide-field, high-resolution image.
When using magnified images from a microscope, etc., you can observe and analyze a wide area while maintaining accuracy.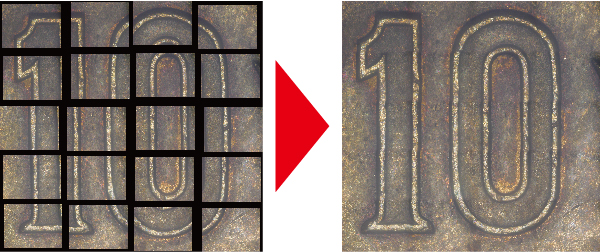
|Function for generating arbitrary cross lines, grid lines, and concentric circles
You can display cross lines, grid lines, and concentric circles at any position.
You can also change the line color and thickness.
-Arbitrary cross lines-
-Arbitrary grid lines-
-Arbitrary concentric circles-
|Calibration glass scale included as standard Four types of scales: 20µm/100µm/500µm/1mm increments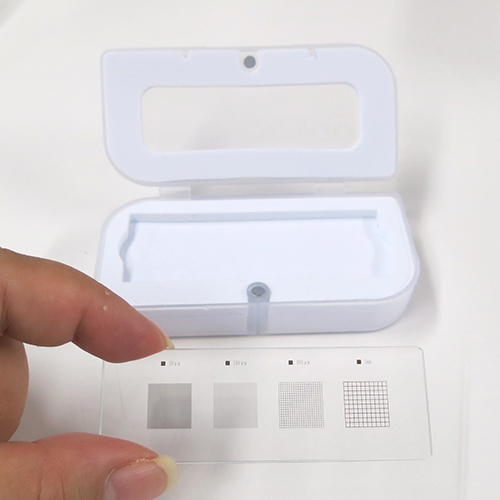
|Specifications
| Model Number | MF-Measure TG |
| Field Of View | 16.0mmx12.0mm (at minimum magnification) |
| 2.7mmx2.0mm (at maximum magnification) | |
| Working distance | 90mm |
| Resolution | 0.01mm |
| Camera Pixel | 5 megapixels |
| Standard equipment | Zoom lens, 5 megapixel USB3 Vision camera, parallel light transmitted illumination, stand, calibration glass scale, image dimension measurement software |
*PC not included
|Operating Environment
PC not included.
Please prepare a PC with the following specifications separately.
| OS | Windows 10(64bit), 11 |
| CPU | Intel Core i3 or higher |
| RAM | 8GB or more |
Inquire about this product
Tel: 02-664-2246
Mail:info@shodensha.co.th
Business hours 8.30 - 17.30 (Closed on weekends & public holidays)


