Microscope and measurement software ideal for welding penetration measurement
2192 Views |

Welding is used in the metal joining process.
Welded parts are important parts related to product safety.
Therefore, we perform penetration inspections such as measuring the penetration depth.
Measure the cross section to see if the penetration dimensions are appropriate, and check if the penetration is insufficient or not.
Inspects for poor weld fusion, clearance, overfill, etc.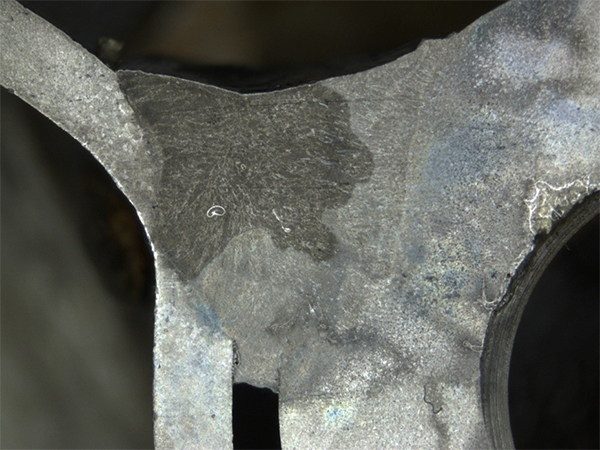
-Pre-processing-
Penetration inspection of the weld cross section requires the following pre-processing.
1.Cut the test parts
2.Polish the cross section
3.Etching treatment using chemicals, electrolysis, etc. depending on the material
We perform pre-processing such as, and perform observation and dimension measurements.
Leaving such pre-treatment to the experts,
we would like to introduce a product that is perfect for measuring weld penetration dimensions.
-Photography/Dimension measurement-
We took a picture and measured the dimensions using our microscope.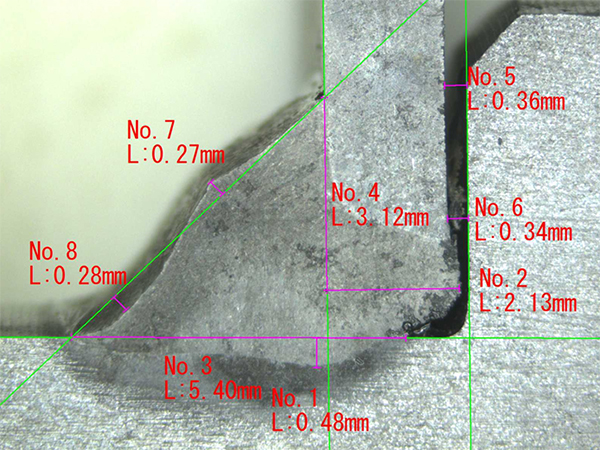
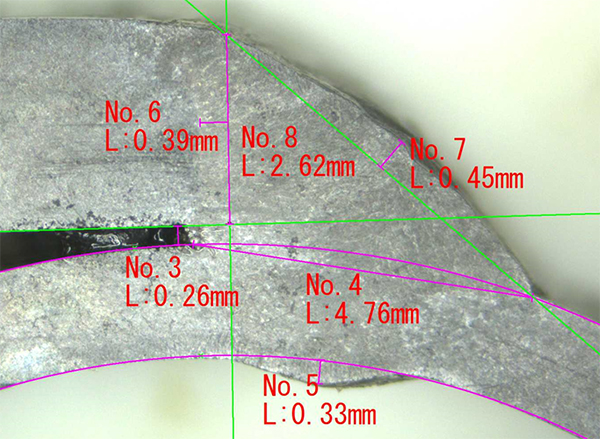
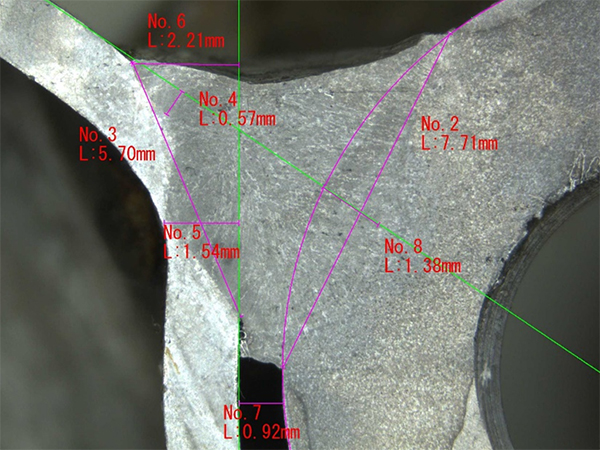
in this way
・Generate a reference line
・Measure the distance from the intersection of the reference lines
・Generate parallel lines
・Measure the perpendicular distance from the reference line
These steps need to be repeated, which can take a lot of time if there are a large number of samples.
Our measurement software is fully equipped with functions to assist with measurements such as the ones listed below.
It also helps shorten inspection time when measuring the amount of penetration in welding, which can be a time-consuming process.
-Functions of the measurement software used this time-
1.Cross line generation
Click anywhere with the mouse to generate a cross line on the screen.
If it is misaligned, you can easily change the line position by clicking again.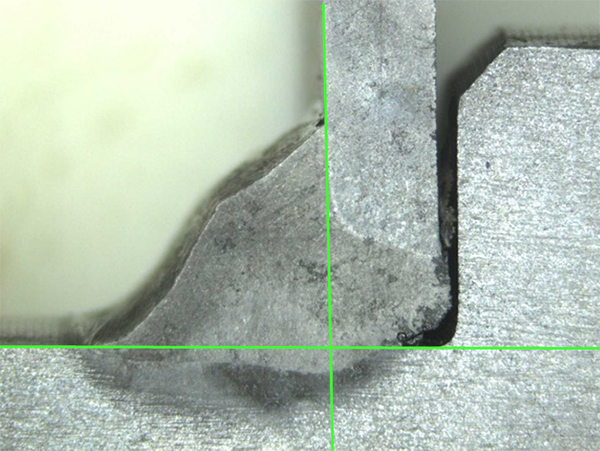
You can also change the color and line width.
2.A wide variety of measurement items
There are a variety of measurement items, and it can be used not only for actual measurements but also as a reference line.
When using it as a reference line, you can turn off the measurement value display.
"Vertical distance" was particularly useful this time.
You can also change the display color of each measurement line and numerical value.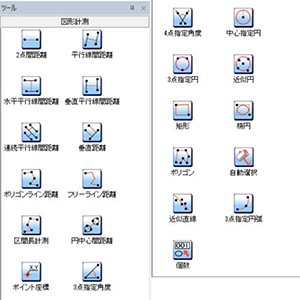
●Distance between two points
●Distance between parallel lines
●Distance between horizontal parallel lines
●Distance between vertical parallel lines
●Vertical distance
●Distance between circle centers
●Point coordinates
●3-point specified angle
●4-point specified angle
●3 points designated circle
●Approximate circle
●Rectangle
●Ellipse
●Approximate straight line
●3-point designated arc
etc
3.Edge automatic fit function
When you move the mouse cursor close to the line you want to measure, it will automatically fit to the edge.
This reduces human error caused by the measurer and enables accurate measurements.
4.Pinpoint digital zoom function
By turning the mouse wheel, you can digitally zoom in and out around the point indicated by the mouse cursor.
Therefore, human error caused by the measurer is further reduced.
You can zoom intuitively, which is a really convenient feature.
5.Scale display
You can display the scale at any location according to the size you want.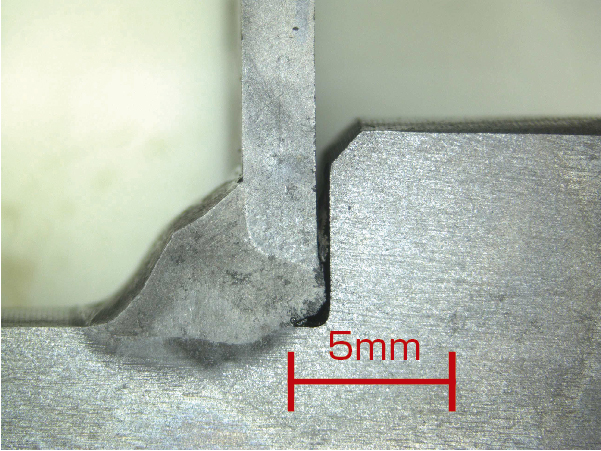
6.One-click report function
Transfer measurement data to Excel with one click of the Excel output button.
You can easily process data and display graphs in Excel.
Raw images, measured values/images with lines, and measured values can be exported to Excel in one go, which shortens the time it takes to create a report and is an extremely convenient function.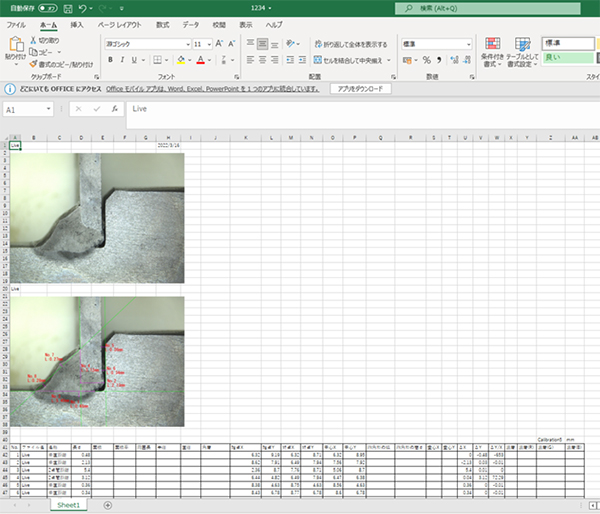
Click here for the measurement software used this time.
●High-Performance Image Processing Measurement Software MF Ship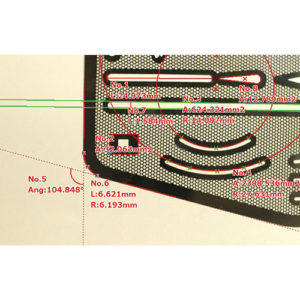
Click here for the microscope used this time.
●USB3.0 Microscope TG500CS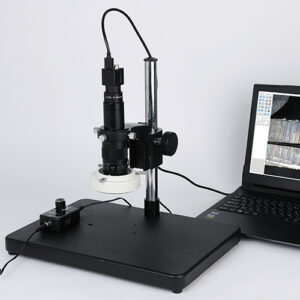
Inquire about this product
Tel: 02-664-2246
Mail:info@shodensha.co.th
Business hours 8.30 - 17.30 (Closed on weekends & public holidays)


